The Latest

**Future blog posts will be listed on my personal website at www.katsprint.com/blog**


Using "Miss" and "Ms." incorrectly
"Miss" should be used when mailing to someone that is 17 years or younger, otherwise always use "Ms." Yes, you can technically use "Miss" with a younger woman who is not married, but that can be offensive, so I suggest the 17 years or younger rule.

Not spelling out the mailing addresses
Spell out everything for the mailing addresses. "Ave" should be "Avenue", "Apt"  should be "Apartment", etc. Abbreviations look incomplete and sloppy.
Wrong: 2200 N. Wilson Ave, Royal Oak, MI 48073
Right: 2200 North Wilson Avenue, Royal Oak, Michigan 48073

Not using proper labels for Doctors, Reverends...
Always spell out Doctor, Reverend, Colonel, Lieutenant...etc. These people typically introduce themselves with their appropriate titles (not to mention they worked their asses off to get the title), so it's appropriate to include it in their invite.
Wrong: Mr. Kevin Schutt
Right: Reverend Kevin Schutt

Forgetting the proper RSVP information
Always include who to RSVP to, how to RSVP, and WHEN to RSVP by. 
Helpful tip: Put your guests in an excel sheet and number their RSVP card (tiny and in a none noticeable place) per the number they are in the excel doc. A lot of times people respond incorrectly or with hard-to-read hand writing. This will help you keep track of who you invited vs. who RSVP'd.

Not pre-stamping the RSVPs
It's hard enough to get people to RSVP, make this process as easy as possible by pre-stamping the RSVP card or envelope for them. (Yes, you will still have those jerk friends and family who don't, but at least you tried and can give them a hard time about not RSVPing.)

Typos, typos typos
Check the names, date, location, then do it again, then do it again, and then have your spouse check it, then have someone else check it. You're spending enough money to make the extra 10 minutes of proofing worth it.

Not seeing a proof
If you have the ability, print off the invitation, cut it down to size and make sure it fits into the envelope you chose and looks good with any other item (RSVP, hotel card, RSVP envelope, etc.) in your invitation package. Do the colors match? Does everything fit into the envelope together and stack well?
Helpful tip: If you have multiple items in your invitation, bring it to the post office and get it weighed. You'll regret not doing this if it turns out you didn't have enough postage on your envelope.


Not including the dress attire for anything unconventional
Don't be surprised when Aunt Shelia is upset because she wore a beautiful dress and heels to your super casual, outdoor wedding. Her heels are getting stuck in the grass, falling off her feet as she walks to her seat. One of my friends had me note in the invitation to wear wedges or no heel as guests will be walking on grass, that was perfect.
If you are looking for people to wear slacks and a polo or jeans and a button-up instead of a suit, let them know. If your wedding is anything out of the "average dress attire." (I would classify "average" as dress pants, button-up and tie for men and a nice dress and heels for women).


**Future blog posts will be listed on my personal website at www.katsprint.com/blog**


Last week I wrote about how to stay sane during wedding planning. I mentioned keeping an organized guest list, budgeting spreadsheet, photo list,  and seating chart. I looked around for templates, but couldn't find any that I could easily edit myself, so I made my own.

These custom templates were extremely helpful to me, so I thought I would share them with other brides-to-be.


Template links
  • Budget template
    • 2 tabs at the bottom; one for overall costs, and the other to keep track of monies given to you by family or friends.
    • Note that the bottom should calculate everything for you, just change the specific amounts on each tabs.
  • Guest List
    • 3 tabs at the bottom; one is your final list and the other 2 are you A and B listers (harsh, but are are needed).
    • This template offers various columns for rsvps, maybes, rehearsal, etc.
    • I also listed out some proper ways to address your envelopes.
  • Photo list
    • This is the list I used for my wedding day. I found it so much easier to list them out as each section of the day happened.
    • This is best to finalize after you have your final timeline complete.
  • Seating chart
    • We found this was the easiest way to plan out where people were sitting. You can easily see all of our guests at a glance and move people around quickly. Our vendor uses this exact template for the wedding day.
    • Also note the colored areas for vegetarian, children or other meal selections.
  • Ceremony/Reception Q/A sheet
    • Print this out before every meeting with potential locations. It's perfect for comparing the positives and negatives of each company.
    • You could also highlight some of the most important questions for quick skimming.

How to get the templates
  • If you have a gmail account
    • Click the link(s) above for whatever template you want
    • File > Make a copy...
      • This will make a copy so that you can edit the document as you want
      • It has also been added to your Google Drive account
    • From here, you can put it into your wedding folder on your Google Drive


  • If you don't have a gmail account
    • Click the link(s) above for whatever template you want
    • File > Download as...
      • Pick whichever applies to you (you'll probably want excel)
    • From here, you can edit the document as you want

They are set up to automatically calculate (if needed), so you should just have to edit any existing numbers, or simply just start filling them in.

Have fun!
Email me if you have any questions, I'd be happy to help.

Kathleen Spangler  //  www.KatsPrint.com
**Future blog posts will be listed on my personal website at www.katsprint.com/blog**


I was married on November 23, 2013 and had less than a year to plan my wedding.
 I've always considered myself to be an extremely organized person, so when it was time to plan our wedding, I was excited for the challenge. I have heard so many people say they hated planning their wedding, so I thought I would share some helpful tips on what kept me sane and also things I learned myself.


// Write out everything you've liked and disliked about weddings you've attended
  • We all have a list in our head of "I'll never do that..." or "When it's my wedding I am definitely doing this..." This list will help you when time comes to make decisions, just simply refer back to the list.
  • TLC has some great wedding shows, you may get some great ideas by watching Four Weddings or Say Yes to the Dress.


// Create a wedding email address 
  • I suggest using gmail, you'll find out why later in this post.
  • Sign up for promotional emails, websites, vendors, everything with this email address. That way when the wedding is over, you can cancel that account and you won't get any more wedding emails following the wedding day.


// Sign up for a website that has a massive check list
As a new bride, you're probably unsure of EVERYTHING that needs to be planned or decided. These websites have nearly perfected the check list with appropriate dates. 


// Get a wedding booklet that has tabs of each category
  • Barnes and Noble has a huge selection of planners.
  • Stuff all of your receipts, contracts, color palettes, dress ideas, decor ideas, etc. 
  • Always bring this with you to your appointments in case a vendor has a question about something, you'll always have everything right there. If it's not there, it will be in your Google drive account that you can access with your phone or tablet.


// Sign up for Pinterest
  • Make a wedding board, pin everything you like and think you would ACTUALLY do.
  • I have two wedding boards, one is full of stuff I did for my wedding, and one is for my future freelance projects:


// Take care in designing your printed materials
  • Am I a little biased towards having nice save the dates, wedding invitations or other printed materials? Yes, but for good reasons.
    • Your save the dates are the FIRST thing your guests will see for your wedding. Get them excited to come by adding fun details, or a taking extra care in how they actually save the date.
    • Your various invitations should be... inviting. Yes, people say they get it and throw it away, but if it's something really interesting or unique, people won't throw it away, they will keep it because it is so unique. Really think about something fun you could incorporate to pull the theme through that only piece of your wedding they have.
    • Your printed items are the face of your overall theme. Show off your colors, textures and personality that your wedding will be.
    • See some of the designs I have done for clients.


// Start your guest list(s) early
  • After you've created your wedding gmail account, start your lists in your Google drive. It's easy and always accessible.
  • Start with writing everyone you ever thought you would invite, as time goes on, look at the list, you'll remove and add people as you both discuss the list over and over again.
    • From a short to long engagement, friends will come and go, so when time comes to send those save the dates, you'll have a list that you've looked at a million times
  • Start lists for your showers, wedding, bachelorette/bachelor party, rehearsal dinner, rehearsal, etc.
    • I suggest having his/hers categories (his family, your family, his co workers, your coworkers...etc.). This will help when you both are reviewing the list to have everything organized.
    • The spreadsheet should also include a column for estimated amount of guests, this will be a good indicator for making venue or food decisions. 


// Lists, and lists and lists
  • Google docs (psst this is where the gmail account is good to have)
  • Items you need to purchase. Small things like boutineer pins, wedding shoes, jewelry, or wedding party gifts can be forgotten, or potentially purchased early on if written down. Then as you purchase them, mark it in the doc.
  • Items that need to be designed. There are a lot of items that need to be physically designed and printed off (save the dates, envelopes, invitations, signs, thank you cards, etc...) In this list, you should also note if there is an example on Pinterest and refer back to it when picking these items out.
  • Outfits to be purchased (rehearsal dinner, bridal shower dresses, suits, dress pants, bachelorette party). Keep an eye out and you can get all of these dresses for super cheap and have them prepared for these big days.
  • Photographs. As you pin them, mark them down in your list, and just keep adding to them. When the big day comes, you'll have an entire list of photographs you want and won't be regretting not getting the ones you wanted.
    • Another thing you can do is think about how the day will play out and what photos you would want captured during each of those moments.
  • Song lists. Hear a good song you want played at your reception or wedding? Write down, you will forget them when the time comes to create a playlist.


// Become an online DISCOUNT shopper
  • Sign up for alerts from Slickdeals.net, Groupon, Living Social, Wedding Paper Divas, Minted. Then after you've made your list (psst, from above), check their mailers and see if there is anything you need and can get at a discount. You will get to the point that you know what you have left to purchase and any time you are out shopping or run across a sale, you'll remember to purchase it.
  • Check RetailMeNot for additional coupons before purchasing online.
  • Look for your items on Amazon, and if you find yourself purchasing a lot from there, become an Amazon prime member for the year and get 2-day shipping for $80/year.


// Create a wedding calendar
Mark down every date (dress fittings, send items to printer, contacting specific vendors, payment due dates). Also set email reminders days in advance.... there will be no late bills or missed appointments.


// Budget!
  • Don't be afraid to talk to all of the parents to find out what (if any) financial support they can provide. You can't plan a wedding if you don't know what you're able to spend.
  • Create a budget spreadsheet, contact me if you would like a template!
    • Mine laid out exactly who paid for what, when they did, what amount they had left to spend, and when the next payment was due. Our parents loved this, don't depend on them to keep track of your spending, let them know you've got everything under control and show this spreadsheet to them every few months.
    • Give each set of parent(s) a specific vendor they will be paying for. Since these bills tend to be larger, it will be easier for them to plan out their spending and be able to knock their covered amount out in just a couple payments. You don't want to be bugging them every month for more money, that will be hard to keep track of and create potential problems. Be sure to always get a receipt if they pay a vendor.
    • Create an estimated and actual column to keep track of your spending. Maybe you have more room to spend more on food because your dress ended up costing less than you thought it would. Don't forget to always mark these items down as you go along.
  • My husband and I opened a joint checking account where we both put money from our own accounts into it. That way both parties are donating to the wedding, and you can easily track your spending from that one account and you both have debit cards at all times.


// Be a planner
  • Your friends will tease you, but deep down they are a little jealous they weren't as planned out as you. With wedding P-L-A-N-N-I-N-G, it's best to figure out what you want/need early on, and then purchase, make, and decide, in the early stages of your engagement. Weeks out from my wedding I had very little to do, and was not the least bit stressed because I planned tasks out throughout all of the months I had.
  • Pin it, then DO IT. I wanted a brooch bouquet, so I made it. Simple as that. If you really want something, either make time to do it yourself (by using your lists and calendar events), or hire someone to do it, but do it in advance and get it done with. Do not save it for another day, it won't happen.
  • Create a day-of agenda for your family/wedding party (after you have your complete timeline done, of course). You will have 50+ people asking you the same questions over and over. Make the agenda by hour, tell people where they need to be, and the days leading up to your wedding will be a breeze. You can give it to them on the rehearsal night, or days in advance.


// Don't be TOO selfish
  • Most people say "it's your big day, do what YOU want." Sorry people, that's a lot easier said then done. If you want people to show up and have a good time, then you will need to take their needs into consideration, to an extent. For example, if most of your guests are traveling to your wedding (2 hours +), send a save the date with info they need to plan ahead, make them a welcome bag when they check-in, plan group events (if possible) to include them in more than just attending the wedding.
  • Do assigned seating. Think about those friends who know 1 or 2 other people at your wedding, they will be stuck at a table with people that they probably have nothing in common with. Take the extra time and decide who should sit by who. You and your fiance are the only ones that know ALL of your guests, place them with people they can share conversation with.
  • Provide food you think most people will enjoy. Maybe you and your fiance like fish, that's great... what about the other 180+ people? My guess is maybe half of them are "OK" with fish. Same with the dessert, maybe offer a bunch of dessert options for people instead of one cake flavor. My husband and I offered 9 different options of desserts in hopes that every person would like at least one item and actually eat the dessert.


// Control the parents needs
  • Sit them down before any major planning happens and kindly explain that you want their involvement, but remember what the day is about. This will help them understand right away, that the celebration is not for them and their crazy requests will probably be turned down.
  • Don't be afraid to say "No". Choose your battles wisely, but if you strongly feel one of their requests is out of line, you and your fiance have the right to say no (kindly, of course). Just remind them, again, of why you are making the choice you are and hope they can support you in that choice.


// There is no "standard" or "normal"
  • Every couple is unique, so any time someone tries to feed you the "...well usually..." or "...traditionally it's done this way..." or "...most brides..." tell them to shove it. Your wedding day should be a representation of you as a newly married couple. There is no "normal".


// Choose your bridal party carefully
  • This is the one thing I would wait to do, unless you are 100% sure of specific people. My suggestion would be to ask people before the save the dates go out (which is about 4 - 6 months out).
  • Like I mentioned above, things happen, friends come and go. Who you thought was one of your best friends when you got engaged, may become more distant as the engagement goes on. Really take the time to think about those people standing up there with you. They should be 100% supporters of you AND your fiancé, ready to be helpful towards making your wedding the best they can for YOU, not them, and be ready to spend some money.
  • When you ask people, try to make it special for them, make them feel like you really want them part of your day. If you happen to have the info, tell them your expectations (financially and morally).Do you want them to attend all of the showers? Are they paying for their dress, hair and makeup, should they help plan the bachelorette party? Try to answer all of these questions and more. Yes, they are your friends and they should be willing to make the effort, but be respectful, and think about if that were you. You know them best, what do you think they should know?
    • To anyone who gets asked to be in a wedding party. Being in a wedding party is not cheap, I repeat, NOT CHEAP. It can be, but don't be surprised if it isn't. If you get asked to be in a wedding party, and you are concerned about money, ask them what they think the costs would be right away. Don't wait until it's time to order your outfits and start complaining towards the end. Also, don't be afraid to express your opinions, but just because you say them, doesn't mean it's going to happen that way.


// Share the special moments
  • I purchased custom robes for my bridal party (that matched my theme) so that they would all look pretty the morning of the wedding. I know not everyone can afford it, but I think it's worth hiring people to come to you and your girls in the morning.
    • It's never fun to figure out rides to and from the ceremony location, and then worry about the weather, too.
    • You can also set up a little food buffet for everyone to munch on while everyone gets ready.
  • Include the mothers. I had my mom and my husband's mom get their hair/makeup done with my bridesmaids. They loved being in the room watching me and my friends get ready, Plus, they want to look their best for the big day, too!
    • For one of their gifts, get some custom made button-ups for them to wear the morning of, it will make them feel special that you are including them.


//  We were happy we bought...

  • Custom made hanger with your future last name on it, (psst get the hangers with the notches). My girlfriend Ashley does them, and they are beautiful!
  • Watches for the groomsman. We got all of our groomsman new Invicta watches, and they all loved them. What guy doesn't like AND will use a new watch?
  • Matching clutches for the bridesmaids. You probably already got them their jewelry, why not supply them with clutches they can carry their various items in, too?
  • Shoes for the bridesmaids. Every bridesmaid tries to go all day and night wearing those beautiful heels, but it never happens and they switch to flip flops. Look around for cheap gladiators, or flats they can all wear when the receptions rolls around.
  • 45 person party bus for our closest friends. Not only were we able to fit our bridal party and their guests on our bus, we were able to fit most of our good friends on the bus with us, too. 
  • After-party food. After the reception, our guests were invited to go down to the restaurant below and eat some good food to fill their drunk bellies.
  • Bigger rehearsal dinner. This worked well for us because a lot of our family came in from out of town. No, the bill wasn't cheap, but we loved having our family, bridal party and some of our friends there with us.
  • Photobooth. This was our party favor to our guests, and everyone seemed to love it. Plus, we got a booklet of all of the photos and messages from our friends at the end. it makes a great booklet for the coffee table.


// Hire a day-of event planner
  • I am an over-the-top planner, but when my wedding day came, I just wanted to enjoy everything we planned. My wedding planner, Chelsea, was AMAZING (if you're getting married in Grand Rapids, MI, hire her). 
  • Top reasons to get a day-of planner:
    • They handle the scheduling. They will make sure your timeline is met, and everything happens on time by letting you know you've got 10 mins until this... and then telling your fiancé and his buddies where to go, etc.
    • They deal with the vendors. A month+ in advance to your wedding, they will begin contacting the vendors and confirming times, contracts, price, etc. This is one of the biggest hassles most brides run into the week of their wedding.
    • They have seen it all. They have planned several weddings, and know what they're talking about. If you don't know the answer to something, they will. Run into a problem? They know the answer and how to properly solve it.
    • They are there to make YOUR DAY better. The smallest tasks (go get Aunt Piper and tell her to come to the room, get the money to pay the vendors, set your welcome tables up AND take them down, take your gifts up to your room, deal with complainers and people with questions). 
  • That is just a few off the top of my head that my planner did. They are not cheap by any means, but you WILL regret not having one.
  • Heck if you are completely lost, hire a full-time planner. They will help with colors, theme, dress, desserts, everything that goes into a wedding.


//  We wish we would have spent money on...
  • A videographer. I have seen my friend's videos and they are so beautiful, with capturing an entire day in just a few minutes. 


At the end of our wedding night, my husband said "This was the best day of my life, can we do it again tomorrow?" I was so happy to hear he had such a good time, it's so sad to hear when brides talk about how their wedding was anything but amazing.

Hope these tips help you if you're planning your own wedding, or pass these tips onto a friend! Feel free to email me or comment with questions, too.


**Future blog posts will be listed on my personal website at www.katsprint.com/blog**

Before my husband and I moved into our home, I claimed the smallest bedroom in the house to be my "closet". This room will someday turn into a baby's room, but for now, it's a closet. Over the past couple of years I've been making subtle changes here and there with a goal to make the room feel like I'm going shopping every time I enter the room. 

If you have a walk-in closet or a closet room, you should make this your goal, too. Next time you walk into a store, look around and take notice of the layout, colors, shelving, etc. Below are a couple pictures from my closet and what I did to get there.

Shoe Racks / Vanity
Shoe Racks
I have ALWAYS had a lot of shoes, and have struggled through the years with finding shoe racks that can hold the weight and also look nice. I think it's nice to be able to see all of my shoe options at once, otherwise I will forget I have them. After doing a lot of research on the best way to showcase your shoes without doing an entire makeover on the room, I purchased these 4 of these, ClosetMaid 5-Shelf Organizer - White from Target. It's best to find someone who has a target card so you can get the free shipping, otherwise shipping is SOOO expensive. 


What I liked about these shelves: 

  • Color: They are white, which is very versatile.
  • Quantity of shelves: Unlike most book shelves, these have 5, which are nearly perfect for most pairs of shoes. Most book cases out there come with huge gaps, for shoes, you just need a small area.
  • Size: I was working with a limited amount of space, and these shelves were a perfect size, no too big, and not too small. They also feel very secure without having to nail them to the wall.
What I did to better suit my closet:
  • I had to use white bars from my old shoe rack in order to get my heels to work with these shelves. Any heel that was taller than 3 inches needed to be hung or placed at the top of the shelves. Not that big of a deal, and I think they work great (I can always go back to the shelves if I want to).
  • Luckily these shelves have the ability to be stacked, and come with little wooden pieces to help them stack without moving.
  • No backing. I hate those white backings that come with these type of shelves, I also think it's nice to see through the back at the color on your wall (personal preference).


Vanity
I think every girl/woman should inherit, or own a cute, classy vanity. Mine was given to me by my great grand mother, and I plan to keep it until I can hand it down myself. A vanity adds a certain 'womanly' feeling to the room.

Vanity's also help store all of your beauty items. Personally, I think it looks sloppy to have all of your makeup and hair items sitting out for all to see.


Leggings, Purses, and Scarves
Leggings
This year I started purchasing more leggings, and I wear them all of the time. I got these two small black baskets from the Dollar Tree, and rolled the leggings up in them. They look cute, and are easy to access.


Purses/Scarves
Other items I seem to be collecting are purses, clutches and scarves (we will get to the clutches in a second). You can't see them in the picture, but I purchased 5 Gatehouse 2-Pack Double Clothes Hooks from Lowe's and simply hung them from the hooks. A good way to get the purses to hang freely is to stagger the hooks, left to right.


Closet Organization
Color Code your Clothing
This will make your life so much easier. You can even take it one step further and organize by type, too. For me, one of the first thing I decide on are leggings or jeans, then I move to my top. So based on whatever color/type pants I've chosen, will help me determine the color and type of shirt.

I also have bins at the top which are categorized by work-out clothes, tanks, pants, undergarments, and sweaters. Bins are always a nice organizational tool, too.


You'll notice there are some more shoes at the bottom of the closet. Like stores do, I took my flip flops/gladiators and stacked them in 2 wicker bins. This will be so much nicer come summer time when i am deciding which ones to wear.


Clutches/Belts
Again, I love to have my accessories out in the open for me to see. I will admit that these are not all of my clutches, I do have some of them stuffed in the hanging purses. I hung 2 Ribba Photo Ledges from Ikea on the wall (psst, they come in 2 sizes, 21 and 45in.) and then carefully stacked my clutches on top of them. Each ledge can hold 11 pounds, so don't worry about the weight part.

For my belts, I simply hung them from 2 wooden hooks that were given to me by my mom. You could also purchase more of the hooks I mentioned above and hang them from there, too.


These subtle changes will help make a tiny bedroom feel like your own clothing store each time you walk in. There are a couple of other ideas I have in the future, check them out below:

Future Ideas
Lighting // Purchase a cuter lighting fixture, like a chandelier. 

Wall Color // I liked it when we moved in because it is so bright, but now I am thinking I want to tone it down to a more neutral color.

Curtains // Right now I have some nice full length curtains (always purchase full length if you want to make your room feel taller) that are brown. I would like to allow for more light to show through, but with maintaining privacy at the same time.


**Future blog posts will be listed on my personal website at www.katsprint.com/blog**

Like many, our linen closet was tucked away in our hallway, collecting miscellaneous items and semi-serving its purpose. In my last blog post, I changed our end closet into a showcase, and in this blog post I'll show you how to turn your linen closet into something nice to look at.

Step 1 // Paint
Choose whatever paint colors you want showing, remember there won't be any doors covering the closet anymore. I choose the same eggshell color and gray color from my last project (they are in the same hallway).


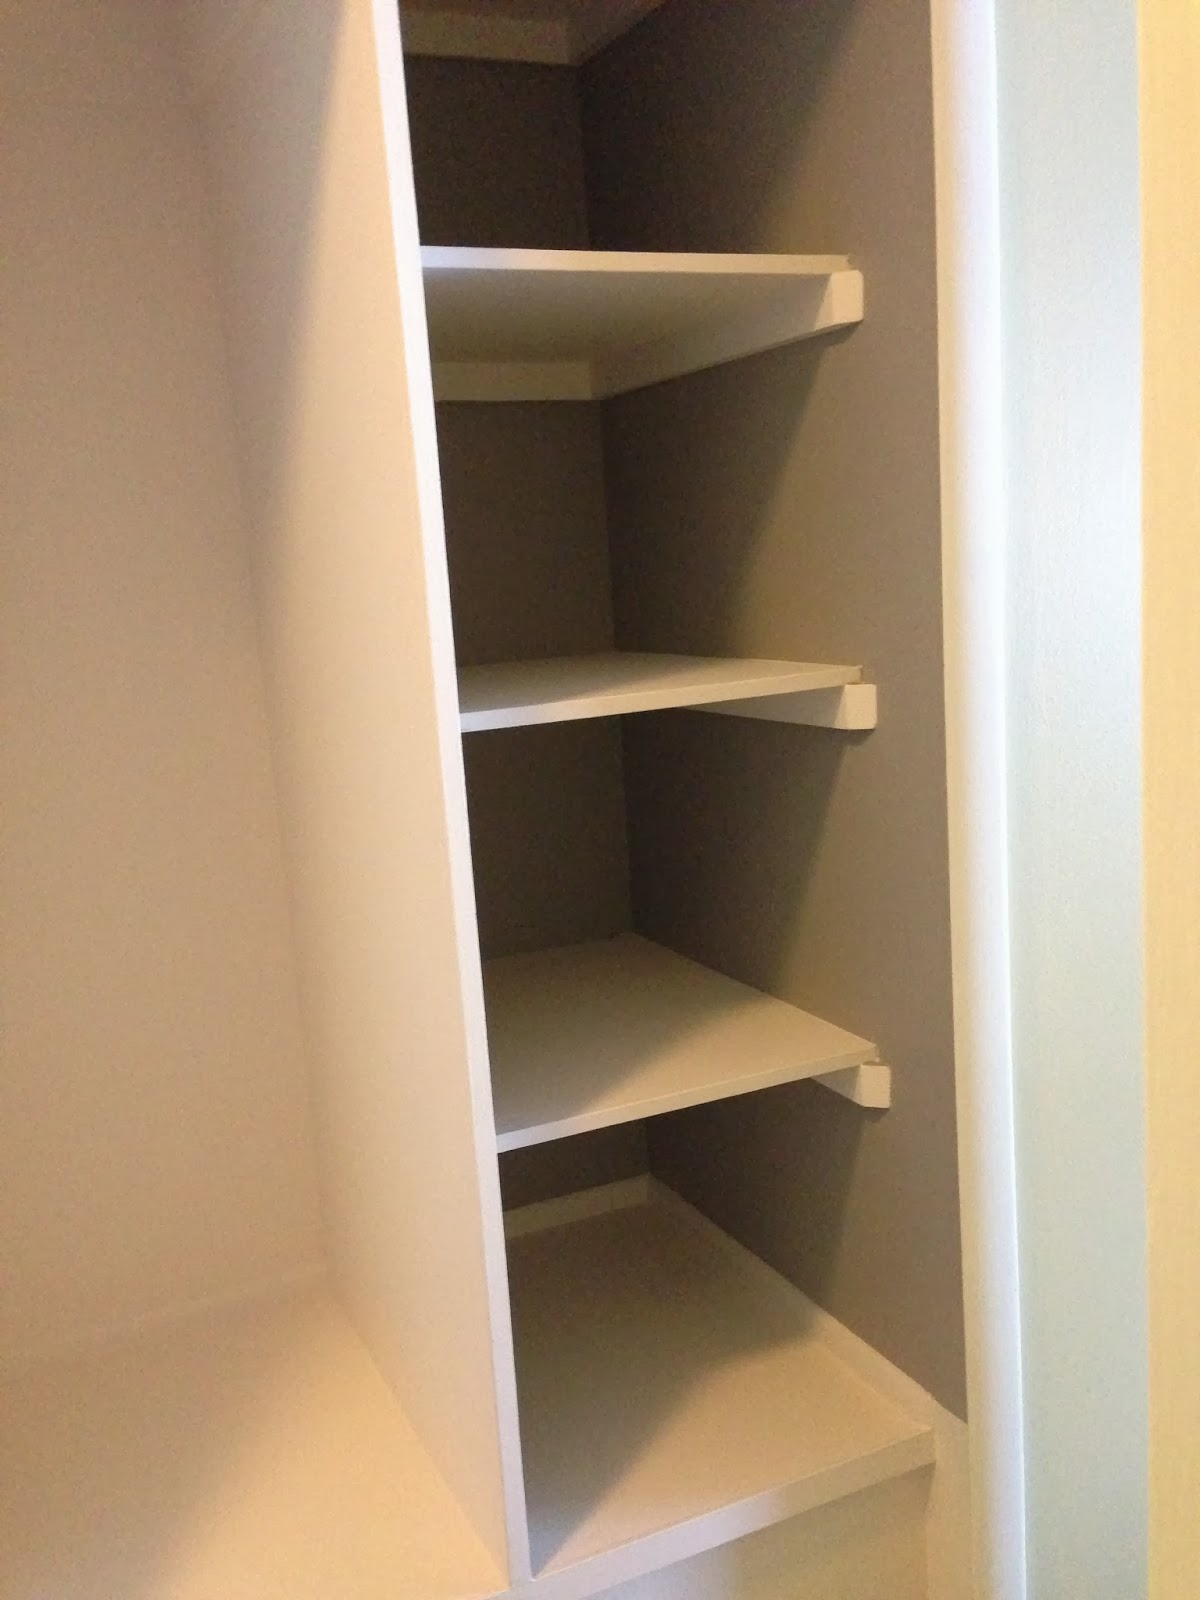
Step 2 // Add Shelves
These shelves were made the same as they were in my closet update post. We also added a little bit of the wood from the new shelves to the front of the older shelves to tie them together.


Step 3 // Organization, Baskets and Bins
I ended up taking everything out of the closet, then organizing everything into 8 categories. To add a little style, I wanted to have 2 different kinds of bins; one wire and one cloth. We ended up going with white baskets from Ikea and yellow baskets from Crate and Barrel.


The Final Product
These subtle changes have really opened up our hallway and allowed us to add a little style in places you wouldn't typically see.


My husband and I moved into our home about 2 and half years ago. It's a cute little space, about 1,000 sq. feet of living area. One of the biggest obstacles we run into is making our home feel bigger, this artice talks about one project we recently did to make better use of our hallway.

Project One, The Hallway
This is the only hallway we have in our home and it has always felt very tight. There is a dinky cleaning closet at the end, and a linen closet to the right. We found ourselves not really using the dinky closet at the end of the hallway, and we were using the linen closet to dump various bathroom, personal, medical, you-name-it-can't-find-a-spot stuff.
GOAL: Convert the dinky closet at the end of the hallway to a showcase.
THE DEMO
Step 1 // Get Rid of Everything

Remove all elements from the closet (doors, shelves, trim, etc.) The shelf was a little tricky to do, I ended up hammering from the bottom-up to release the shelf.
! Helpful Tip !Easily remove the trim by using a razor knife to cut through the paint, then stick a flat head in the crease and tap on the end of the flat head with a hammer to help release the trim from the edge. Do this from top to bottom and begin prying the trim off.
Step 2 // A Light Sand
Take a piece of sanding paper and go over every spot that you ripped out to make the surface smooth.

Step 3 // Mud and Sand
Take a mudding spatula and mud over any area that was semi-damaged when removing the shelves, trim, door hinges, etc. ! Helpful Tip ! I chose to mud over the hinges, the other option is to cut out wood pieces, glue them in and THEN mud over those. After the mud is dry, using medium-grit sandpaper, smooth the rough areas - paying particular attention to the edges with gentle, even pressure. I had to go back and mud some areas again, this is normal, sometimes you do sometimes you don't!
THE CHEVRON PATTERN
Step 1 // Prime It
After the mud has completely dried, it must be 100% dry... use a nice primer and paint all of the walls, you may or may not need 2 coats, depending on how much mud you had to use and what the underlying color was before. ! Helpful Tip ! You must use a primer when mudding, using a "Paint + Primer" will not work and cause the paint to peel when you put painters tape on it.

Step 2 // Choose your Colors
Once the primer has had time to dry, you can now put your primary color paint on it. With my chevron pattern, I used an eggshell / light gray color. So first I painted the walls with my eggshell color, then let it dry. I only needed one coat since my primary color was so close to the primer color.


Step 3 // Create a Grid
You can do this by either measuring it out, or using something around the house that is square or rectangular (I used a small rectangular box). A lot of blogs tell you to put lines in using chalk, I used a pencil and put tiny dots at each corner of my rectangle box instead. Then take a ruler and connect the dots as follows, using a faint line (my quick example looks awful, I know).
After you've created the lines, use your lines as a guide for your painters tape. When you're done, be sure to note which area will be your current color and which will not, I did this by filling in the DO NOT PAINT areas with the extra tape I had to cut off to make my sharp edges. Whatever areas will be your secondary color (in this case the light gray), you will need to cut the tape so the edges are sharp.

Step 4 // Paint with Perfect Edges
I HATE painters tape because the edge never looks good, so finally I looked up the proper way to use tape and it was the best thing I've ever found. So here is the secret... Make sure the tape is firmly pressed onto the wall. Then take the primary color (in this case it's the eggshell color), and lightly paint on the tape edge that your secondary color will be painted on (the gray). You're creating a seal for the tape using the same color as the wall currently is. THEN paint the secondary color (the light gray) on top of that and on the rest of the areas that need to be gray.
Let the paint dry about 75% of the way, do another coat if needed, if not, begin removing the tape. You'll notice how amazing the lines are.
Now we are ready for our custom shelves and decorative elements!

THE SHELVING
Step 1 // Stain the Wood
You can do whatever color you want (I did driftwood from Lowes)
! Helpful Tip ! We ended up using brushes, the stain goes on a lot faster than with a cloth.
Step 2 // Cut the Wood
Cut it down to the width of your closet, then decide on how many boards per shelf. I did 3 because I wanted a little space between each board (this will allow light to shoot through each shelf). Step 3 // Build the Shelf Holders
We used old quarter rounds to hold the shelves (2 per shelf). Place quarter round at each spot you want your shelf, you'll need 2 per shelf. Then paint them the primary (eggshell) color.
AND...DONE! Our finished product included various pictures and items. We also added 2 sensor lights to the closet since our hallway is a little dark.
(LEFT) BEFORE  // (RIGHT) AFTER